Installation
Requirements and installing HArvest into Home Assistant via HACS.
Requirements
| Component | Minimum version | Notes |
|---|---|---|
| Home Assistant | 2024.1 | Any installation method works |
| Python | 3.11 | Bundled with HA |
| HACS | any | Required for installation |
| HTTPS on HA | - | Required for WebSocket connections from browsers |
Your Home Assistant instance needs to be reachable from the internet over HTTPS - a URL like https://myhome.duckdns.org or https://ha.yourdomain.com. Plain HTTP is not supported; browsers block WebSocket connections to non-secure origins from secure pages.
Popular options for HTTPS remote access: Nabu Casa (easiest, paid), DuckDNS + Let's Encrypt (free), Cloudflare Tunnel (free).
Install via HACS
HArvest is installed as a custom HACS repository - it isn't in the default HACS catalog.
-
1
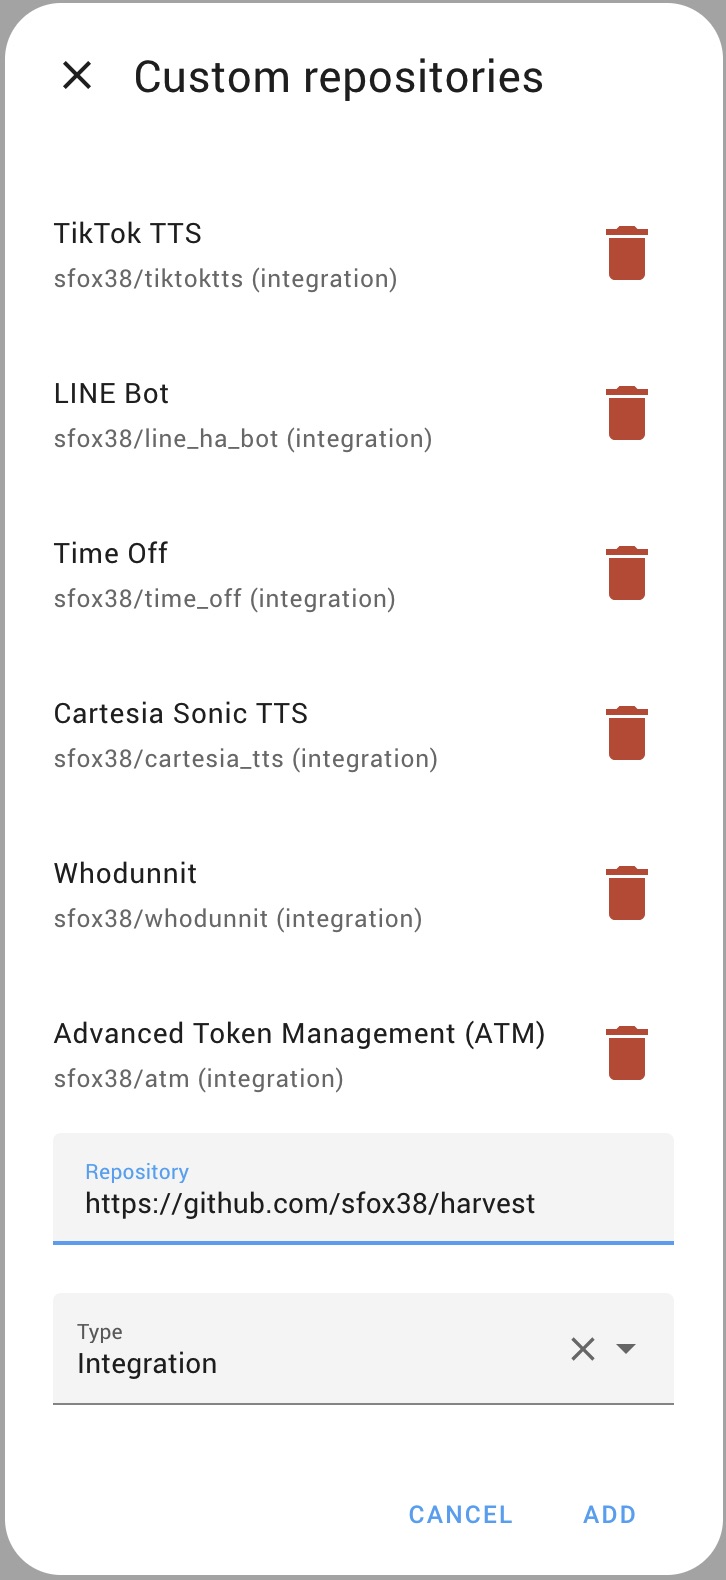
Add the repository
Open HACS in your HA sidebar. Click the three-dot menu in the top-right corner and choose Custom repositories. Paste
https://github.com/sfox38/HArvestas the URL, set the category to Integration, then click Add. -
2
Download and install
Search for HArvest in the HACS integration list, click it, then click Download. Restart Home Assistant after the download completes.
-
3
Add the integration
Go to Settings > Devices and Services > Add Integration. Search for HArvest and select it. No additional configuration is needed during setup - everything is managed from the panel.
-
4
Open the panel
HArvest now appears in your HA sidebar with a leaf icon. Click it to open the panel.
Once HArvest is installed, head to Quick setup to create your first widget and get it onto a page.
Widget script
You do not need to install or upload the widget script separately. HACS installs the Home Assistant integration, and the integration serves the widget bundle directly out of its own files at {your-HA-URL}/harvest_assets/harvest.min.js. The wizard generates snippets that point at this URL automatically.
This means the widget always matches the version of HArvest currently running on your HA instance. When you update HArvest via HACS, every embedded widget on every site picks up the new bundle on the next page load. There is nothing to upload, no CDN to configure, and no version drift to worry about.
If you use the HArvest WordPress plugin, the plugin enqueues the widget script for you. The plugin's "Widget JS source" setting defaults to the same HA-served URL described above.
Hosting the script yourself (advanced)
If for some reason you don't want visitors loading the widget JS from your HA instance (for example, your site needs to work even when HA is briefly offline), you can self-host instead:
- Download the latest release zip from GitHub Releases. Inside the zip, find
widget/dist/harvest.min.js. - Upload it to your web server.
- In the HArvest panel, go to Settings > Connection > Widget script source and switch to Custom URL. Enter the path to your hosted copy.
The wizard will then generate snippets that use your custom URL instead. Note: when you do this, you become responsible for keeping the widget bundle in sync with the integration version. Use this option only if you have a specific reason to need it.
Network requirements
Widgets connect from the visitor's browser to your HA instance using a standard HTTPS/WSS connection on port 443. No additional ports, no relay servers.
If you use a reverse proxy (nginx, Caddy, Traefik, etc.), it needs to forward WebSocket upgrade headers. Most configurations already do this if HA is working normally. If not, add these to your nginx config:
proxy_set_header Upgrade $http_upgrade;
proxy_set_header Connection "upgrade";
proxy_read_timeout 3600s;
proxy_send_timeout 3600s;
Caddy and Traefik handle WebSocket upgrades automatically with no extra config. Cloudflare Tunnel works with a 100-second idle timeout - HArvest's 30-second keepalive interval keeps the connection alive.
Some enterprise networks block WebSocket connections. Visitors in those environments won't see the widgets. HArvest does not have a polling fallback - the connection either succeeds or the card shows an offline state.